This one's for Molly, who asked me yesterday on our way to pick Ollalieberries if I had a good cobbler recipe. My answer? Why yes, Molly. I do.
Yesterday I ventured out to Watsonville with my dear friend Molly, her two cutie pie boys and my own little Addie. We were a sight, let me tell you. Two grown ups intent on picking full buckets of these sweet-tart berries while the kids were off in their own berry heaven world. Jake mastered the art of making jam out of berries and mud, and Tim battled a fear of bees and the urge to eat more than he picked, while Addie was happy to be outside and in the middle of it all.
The kids had such fun, we got an insanely big haul of Ollalieberries, and when we were leaving, Tim announced he was only going to have Ollalies for lunch. And then, not long after that, he begged to eat lunch at the King's Boogers (Burger King was the only kid-friendly place to stop for miles...) All in all, a perfect way to spend the first day of July.
So on to the recipe. Of course, I must admit it's not my own. I use the old Betty Crocker cookbook from 1950--and as far as I'm concerned, it may be the only recipe for cobbler I'll ever need. It's not healthy--not by a long shot. But it's perhaps one of the best desserts I've ever made. I tried this recipe over a year ago when my friends and I set out to cook our way through this old copy of the classic Betty Crocker cook book; sadly, we only got through a couple of weeks until the idea fizzled out. But the idea of this cobbler, hot from the oven with a scoop of good vanilla ice cream beside it, will never grow old to me.
Betty's Berry Cobbler
Ingredients
For the shortcake:
2 cups sifted flour
2 T sugar
3 tsp baking powder
1 tsp salt
6 T shortening
1 cup milk
For the fruit:
2 cups sugar
2 T cornstarch
2 cups boiling water
6 cups berries (blackberries, boysenberries or
ollalieberries) mixed with 1 1/2 cups sugar
1 T butter
1 tsp cinnamon
Method (for the shortcake):
Stir together first 4 ingredients. Then add the shortening and cut in fine with a pastry blender. Stir in the milk to make a soft dough. Set aside.
For the fruit:
Mix together the sugar and cornstarch in a saucepan; gradually stir in the boiling water. Bring the mixture to a boil and keep it there for one minute, stirring constantly. Then add the berry/sugar combination.
Pour the fruit into a 9 x 13 baking dish. Drop spoonfuls of the shortcake onto the fruit nd then dot with butter. Sprinkle cinnamon on top (if desired). Bake at 400 degrees for 30 minutes.
It's best served warm with ice cream, but that's a given, right?
Showing posts with label Recipes. Show all posts
Saturday, July 2, 2011
Monday, May 2, 2011
PB & J Muffins
PB & J muffins--yep, like the classic sandwich, but these just might be better. (Plus, they're made with lots of good-for-you organic ingredients) The first time I made them, I used strawberry banana jam (which was a perfect combination, if you ask me), but this time around I used plum jam because it's what we had in the cupboard. You could certainly use whatever you happen to have on hand, or whatever your particular favorite jam happens to be. The recipe makes about 12 regular-sized muffins, but I think they'd be great as mini muffins too, especially if you're making them for little tummies. They're best just minutes out of the oven, washed down with--what else? A tall glass of cold milk.
Ingredients:
2 cups whole wheat flour
1/2 teaspoons salt
1 Tablespoon baking powder
1 cup milk (I used skim)
2 large eggs
2/3 cups sucanat or rapadura (natural cane sugar)
1/2 cup natural peanut butter
2/3 cups pureed banana
1/2 cup jam (approximately)
Method:
Heat oven to 375 degrees. Line muffin tins with paper baking cups. In a large bowl, mix together dry ingredients (flour, baking powder, salt).
Add milk, eggs, sugar, peanut butter and bananas to the bowl. Using an electric mixer, combine ingredients together (on low speed) until just moistened.
Fill prepared muffin cups evenly with half of the batter (each cup should be about halfway full). Put 1 1/2 teaspoons of jam in the center of each muffin. (As you can see, it doesn't matter if it's perfect...).
Use the remaining batter to top each muffin cup and sprinkle the tops with a little bit of sugar.
Bake for about 20 minutes (or until toothpick comes out clean). Let cool in the pan for a few minutes, and then transfer the muffins to a rack.
Ingredients:
2 cups whole wheat flour
1/2 teaspoons salt
1 Tablespoon baking powder
1 cup milk (I used skim)
2 large eggs
2/3 cups sucanat or rapadura (natural cane sugar)
1/2 cup natural peanut butter
2/3 cups pureed banana
1/2 cup jam (approximately)
Method:
Heat oven to 375 degrees. Line muffin tins with paper baking cups. In a large bowl, mix together dry ingredients (flour, baking powder, salt).
Add milk, eggs, sugar, peanut butter and bananas to the bowl. Using an electric mixer, combine ingredients together (on low speed) until just moistened.
Fill prepared muffin cups evenly with half of the batter (each cup should be about halfway full). Put 1 1/2 teaspoons of jam in the center of each muffin. (As you can see, it doesn't matter if it's perfect...).
Use the remaining batter to top each muffin cup and sprinkle the tops with a little bit of sugar.
Bake for about 20 minutes (or until toothpick comes out clean). Let cool in the pan for a few minutes, and then transfer the muffins to a rack.
I love how crackley and gooey they are when they first come out of the oven. And the smell? So good. Not sure much beats the smell of freshly made muffins in the morning.
Tuesday, April 26, 2011
Gingered Chicken with Sugar Snap Peas
The sugar snap peas we got at the Farmers' Market last week were the plumpest, most beautiful snap peas I've ever seen, and they paired beautifully with the fresh ginger we bought that same day. Inspired to make healthy homemade Chinese "takeout," I served it with steamed edamame and a recipe for bok choy that turned out to be a flop (truly--Joey said it was one of the few things I've made that he didn't like, which he said was a compliment. I took it as such, because I agreed with him--it was terrible.)
Anyhow, this recipe should prove that homemade Chinese food can be made just as fast as ordering takeout. Plus, it's a much healthier version (and even tastier, if you ask me) than what you can find in the restaurants.
Gingered Chicken with Sugar Snap Peas
Ingredients:
A drizzle of olive oil
2 lbs sugar snap peas
4 chicken breasts, cut into 1" cubes
1 1/2-2 inches of fresh ginger, peeled
4 large garlic cloves
salt & pepper
Sriracha to taste
Method:
Heat a large skillet on medium high heat. Drizzle a bit of olive oil and add the chicken. Let brown on one side; as it's cooking, crush the garlic into the pan, grate the ginger over the chicken, and sprinkle with salt and pepper. When the chicken is golden on one side, flip the pieces over, toss a bit, and continue to cook. It's ok if there are golden bits of chicken stuck to the pan.
Add the sugar snap peas; deglaze the pan with some water (a couple of tablespoons' worth). Give it a good toss; cook until the snap peas turn bright green and are as tender as you prefer them. I cooked mine for about 5-7 minutes or so.
Toss with Sriracha, as much or as little as you like. (Watch out--it's spicy, so be careful!)
Anyhow, this recipe should prove that homemade Chinese food can be made just as fast as ordering takeout. Plus, it's a much healthier version (and even tastier, if you ask me) than what you can find in the restaurants.
Gingered Chicken with Sugar Snap Peas
Ingredients:
A drizzle of olive oil
2 lbs sugar snap peas
4 chicken breasts, cut into 1" cubes
1 1/2-2 inches of fresh ginger, peeled
4 large garlic cloves
salt & pepper
Sriracha to taste
Method:
Heat a large skillet on medium high heat. Drizzle a bit of olive oil and add the chicken. Let brown on one side; as it's cooking, crush the garlic into the pan, grate the ginger over the chicken, and sprinkle with salt and pepper. When the chicken is golden on one side, flip the pieces over, toss a bit, and continue to cook. It's ok if there are golden bits of chicken stuck to the pan.
Add the sugar snap peas; deglaze the pan with some water (a couple of tablespoons' worth). Give it a good toss; cook until the snap peas turn bright green and are as tender as you prefer them. I cooked mine for about 5-7 minutes or so.
Toss with Sriracha, as much or as little as you like. (Watch out--it's spicy, so be careful!)
Blue Cheese and Cranberry Stuffed Chicken Breasts
Sometimes, chicken bores me.
I like it. It's good. Joey loves it. We eat a lot of it. But sometimes I sort of think cooking it is a drag.
Last Saturday night I got a little fancy with the chicken because I didn't want to fall into the "let's just grill it" trap. Grilling is great. I love grilling. But sometimes I get bored with it. Sorry, but it's true.
I opened up the fridge and was inspired by a package of cranberry blue cheese that hadn't been used yet. There was spinach and red onion around too, so I thought a stuffed chicken breast might make a nice Saturday night dinner. It was very, very easy, so don't let the "stuffed" part of the recipe make you think it's terribly hard or complicated. It's not. So easy, anyone could do it. Plus, it's fancy enough to serve for a fancy get together, but easy enough to serve on a quiet Saturday evening at home.
I don't have pictures of this one, but rest assured that it is terribly good. If you don't have cranberry blue cheese, just use regular blue cheese and stuff a few cranberries in the chicken along with the cheese crumbles. I don't think it'd be much different. Also, I don't really have measurements for this one because you don't really need them. Just use as much of the fillings as you can get into the breast and still pin it closed with a toothpick or two.
Ingredients:
3 large chicken breasts, cut in half and split open
cranberry blue cheese crumbles
spinach
red onion, thinly sliced
salt & pepper
onion powder
plum jam
Method:
Slice open the chicken breast halves so that you have a nice flat piece of meat. Lay a few spinach leaves on top of the whole breast. Toss on a few slices of red onion, then top with cheese crumbles. Fold chicken over itself so that you sort of have a raw chicken sandwich (raw chicken on two sides, filling on the inside). Pull the chicken close to itself so that it seals the filling inside. This won't be perfect--some pieces will work better than others, so just do the best you can. Secure with a toothpick or two, and place in a greased casserole dish. Sprinkle with salt, pepper and onion powder.
Bake at 350 degrees for 45 minutes-1 hour. Brush plum jam on top of the chicken pieces when there's about 15 minutes left to go. The jam should carmelize a bit and make the tops look just lovely.
I served this with mashed sweet potatoes a simple salad of red leaf lettuce, cranberries, pecans and balsalmic vinegar dressing, but it would pair nicely with a variety of things, I'm sure.
I like it. It's good. Joey loves it. We eat a lot of it. But sometimes I sort of think cooking it is a drag.
Last Saturday night I got a little fancy with the chicken because I didn't want to fall into the "let's just grill it" trap. Grilling is great. I love grilling. But sometimes I get bored with it. Sorry, but it's true.
I opened up the fridge and was inspired by a package of cranberry blue cheese that hadn't been used yet. There was spinach and red onion around too, so I thought a stuffed chicken breast might make a nice Saturday night dinner. It was very, very easy, so don't let the "stuffed" part of the recipe make you think it's terribly hard or complicated. It's not. So easy, anyone could do it. Plus, it's fancy enough to serve for a fancy get together, but easy enough to serve on a quiet Saturday evening at home.
I don't have pictures of this one, but rest assured that it is terribly good. If you don't have cranberry blue cheese, just use regular blue cheese and stuff a few cranberries in the chicken along with the cheese crumbles. I don't think it'd be much different. Also, I don't really have measurements for this one because you don't really need them. Just use as much of the fillings as you can get into the breast and still pin it closed with a toothpick or two.
Ingredients:
3 large chicken breasts, cut in half and split open
cranberry blue cheese crumbles
spinach
red onion, thinly sliced
salt & pepper
onion powder
plum jam
Method:
Slice open the chicken breast halves so that you have a nice flat piece of meat. Lay a few spinach leaves on top of the whole breast. Toss on a few slices of red onion, then top with cheese crumbles. Fold chicken over itself so that you sort of have a raw chicken sandwich (raw chicken on two sides, filling on the inside). Pull the chicken close to itself so that it seals the filling inside. This won't be perfect--some pieces will work better than others, so just do the best you can. Secure with a toothpick or two, and place in a greased casserole dish. Sprinkle with salt, pepper and onion powder.
Bake at 350 degrees for 45 minutes-1 hour. Brush plum jam on top of the chicken pieces when there's about 15 minutes left to go. The jam should carmelize a bit and make the tops look just lovely.
I served this with mashed sweet potatoes a simple salad of red leaf lettuce, cranberries, pecans and balsalmic vinegar dressing, but it would pair nicely with a variety of things, I'm sure.
Wednesday, December 15, 2010
A Dose of Reality - July 27, 2010
This quote was eye-opening for me. Not sure I'll ever be a total locavore (I really, really like bananas...), but it's certainly something profound to think about.
"The main barrier standing between ourselves and a local-food culture is not price, but attitude. The most difficult requirements are patience and a pinch of restraint--virtues that are hardly the property of the wealthy. These virtues seem to find precious little shelter, in fact, in any modern quarter of this nation founded by Puritans. Furthermore, we apply them selectively: browbeating our teenagers with the message that they should wait for sex, for example. Only if they wait to experience intercourse under the ideal circumstances (the story goes), will they know its true value. 'Blah, blah, blah,' hears the teenager: words issuing from a mouth that can't even wait for the right time to eat tomatoes, but instead consumes tasteless ones all winter to satisfy a craving for everything NOW. We're raising our children on the definition of promiscuity if we feed them a casual, indiscriminate mingling of foods from every season plucked from the supermarket, ignoring how our sustenance is cheapened by wholesale desires."
- Barbara Kingsolver, Animal, Vegetable, Miracle (page 32).
The Perfect Muffin - July 27, 2010
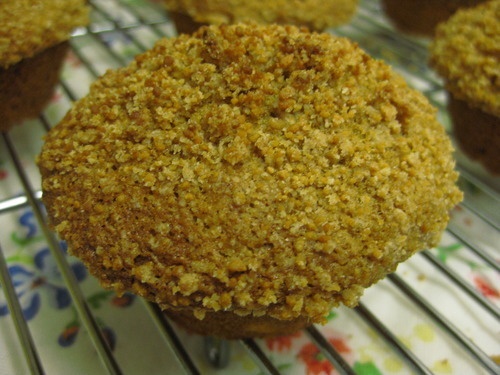
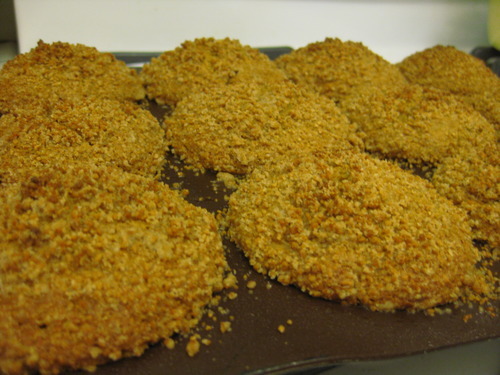
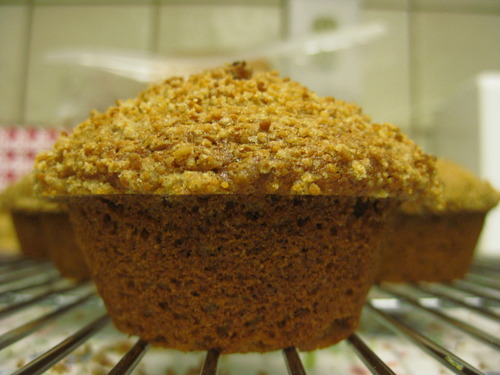
This morning I wish computers somehow captured smells and transported them to you. Seriously. I'll bet my kitchen smells better than yours does. Well, that is, unless you just pulled out freshly baked banana crumb muffins from your oven like I did. They're intoxicating. Seriously.
Wanna peek?

I tried this recipe after having an enlightening, encouraging, inspiring conversation with my good friend Molly who's on a quest for the perfect muffin. She's experimenting with cooking real food too, but she's got a complication that I don't have quite yet--a 4 year old with an opinion. I'm sure my kids will be the same way some day, but for now, baby number one is at the mercy of what I put in my body.
My favorite story about Molly's son Timmy is that he has to have Mac & Cheese out of the box.
Won't touch the stuff otherwise. How in the world does a 4 year old know the difference (or care about the difference)? I'm sure I'll learn very quickly once mine is out of utero.
Anyway, Molly really wanted to find a stellar muffin recipe, one that tasted really good, good enough for Timmy to want to eat it. And one that perhaps was sneaky about the fact that it was actually good for his little body. Well Molly, I think I found your answer. (And I'm bringing some over to you today for you to try!)
This muffin is so good, I actually think it could be the best one I've ever eaten. It's healthy, too. Sounds like a contradiction in terms, right? Wrong. I can't explain it--you'll just have to trust me.
It's made with whole wheat flour, sucanat (a form of unrefined/minimally processed sugar; it's an abbreviated word for "sugar cane natural"), mashed bananas, plus a few more ingredients you'll see below. The version I made does have some oil in it, but you can substitute apple sauce for the oil instead (I, unfortunately, simply didn't have any in the house...).
Here's the recipe, and here's the picture of how they looked when I pulled them out of the oven. You'll just have to use your imagination for the smell, but I promise you--it's insanely good (particularly if you've got coffee brewing at the same time).
Banana Crumb Muffins


Original recipe from PassionateHomemaking.com; I only changed a few minor things, but feel free to peruse that site for the original. It's a great site with inspiring posts (and lots of recipes!)
Wanna peek?

I tried this recipe after having an enlightening, encouraging, inspiring conversation with my good friend Molly who's on a quest for the perfect muffin. She's experimenting with cooking real food too, but she's got a complication that I don't have quite yet--a 4 year old with an opinion. I'm sure my kids will be the same way some day, but for now, baby number one is at the mercy of what I put in my body.
My favorite story about Molly's son Timmy is that he has to have Mac & Cheese out of the box.
Won't touch the stuff otherwise. How in the world does a 4 year old know the difference (or care about the difference)? I'm sure I'll learn very quickly once mine is out of utero.
Anyway, Molly really wanted to find a stellar muffin recipe, one that tasted really good, good enough for Timmy to want to eat it. And one that perhaps was sneaky about the fact that it was actually good for his little body. Well Molly, I think I found your answer. (And I'm bringing some over to you today for you to try!)
This muffin is so good, I actually think it could be the best one I've ever eaten. It's healthy, too. Sounds like a contradiction in terms, right? Wrong. I can't explain it--you'll just have to trust me.
It's made with whole wheat flour, sucanat (a form of unrefined/minimally processed sugar; it's an abbreviated word for "sugar cane natural"), mashed bananas, plus a few more ingredients you'll see below. The version I made does have some oil in it, but you can substitute apple sauce for the oil instead (I, unfortunately, simply didn't have any in the house...).
Here's the recipe, and here's the picture of how they looked when I pulled them out of the oven. You'll just have to use your imagination for the smell, but I promise you--it's insanely good (particularly if you've got coffee brewing at the same time).
Banana Crumb Muffins
- 1 1/2 cups whole wheat flour (whole wheat pastry/soft spring wheat is the best!)
- 1 teaspoon baking soda
- 1 1/2 teaspoon baking powder
- 1/2 teaspoon salt
- 1/8 teaspoon ground cinnamon
- 3 bananas, mashed
- 3/4 cup sucanat
- 1 egg, lightly beaten
- 1/3 cup canola oil (or replace with half applesauce, if you'd rather)
Topping, optional:
- 2 Tbsp whole wheat flour
- 1/8 teaspoon ground cinnamon
- 1 tablespoon butter
- 1/4 cup sucanat, optional
- Preheat oven to 375 degrees F (190 degrees C). Lightly grease 12 muffin cups. I use Pam to grease mine, but that may not be the way you'd like to go. Up to you.
- In a large bowl, mix together 1 1/2 cups flour, baking soda, baking powder and salt. In another bowl, beat together bananas, sugar, egg and melted butter. Stir the banana mixture into the flour mixture just until moistened. Spoon batter into prepared muffin cups, filling 3/4 full. They puff up, so make sure not to over fill.
- Topping (which of course, is optional): In a small bowl, mix together 1/4 cup sucanat , 2 tablespoons flour and cinnamon. Cut in 1 tablespoon butter until mixture resembles coarse cornmeal. Sprinkle topping over muffins.
- Bake in preheated oven for 18 minutes, (a toothpick inserted into center of a muffin should come out clean at this point. If it doesn't, give it another two minutes or so).


Original recipe from PassionateHomemaking.com; I only changed a few minor things, but feel free to peruse that site for the original. It's a great site with inspiring posts (and lots of recipes!)
My Persistent Struggle with Bread-July 16, 2010
It's always been a dream of mine to make incredibly good homemade bread that's so good it makes me wonder why I ever settled for eating bread from the grocery store. I've tried many times before without a whole lot of success. Some, but not recently. My history with bread goes back to my childhood when I would watch my mom or my grandma whip together a few ingredients and magically produce a warm, satisfying loaf. I remember being so enthralled by it that I even did a science project on homemade bread when I was in 5th grade (or was it 6th? I've lost track) in which I made several batches, each time leaving out an ingredient to determine the effect it had on the bread. Good research opportunity that unfortunately doesn't do me any good with my efforts today.
When I got a little older, I started using my parents new bread machine--after all, all I had to do was dump the ingredients in and wait for the magic to happen. My favorite recipe was for Colonial Bread, which suddenly I'm inspired to look up and try my hand at again. It was dark and warm, sweet with the flavor of molasses, and hearty enough to make me feel like it was something worth being proud of. When I got older, my dear friend Molly bought me a bread machine of my own that I could take with me when we moved into our own little apartment up at school, and it worked wonders for me-both because it produced great bread, but it also made my soul feel warm and comforted. I still have it (but admit I haven't used it in ages).
I'm determined to make a loaf of bread the old fashioned way again, but I haven't been met with much success. I've had good results with cinnamon rolls, pizza dough, and quick breads (which are too easy to really put in the same category as yeast breads), but a good ol' fashioned handmade loaf of bread is much more difficult for me. It's extremely frustrating because I know how to do it, and yet...something always seems to go wrong. I think it must be the yeast or the temperature of the water. Perhaps one has gone bad and the other isn't the right temperature. Oh well. I will press on.
This week I found what looked like an incredibly easy, healthy, tasty whole wheat bread recipe (again, from http://heavenlyhomemakers.com/how-to-make-whole-wheat-bread-tutorial). It was easy, but again, it didn't rise for me. The frustration! When my husband Joey got home from work, I had a big lump of dough sitting on the counter mocking me. He asked what I was going to do with it and I told him that I was just going to throw it away (but I wasn't ready to do so quite yet. It was too sad for me.). He suggested I made flat bread out of it.
Oh, my clueless husband. Now, I don't know how to make flatbread, but I'm fairly certain it doesn't involve rolling out whole wheat dough that didn't rise and just sticking it in the oven to bake. Still, I humored him, if for no other reason than he was taking an interest in what I was doing and encouraging me to press on to find a way to put to use something that I didn't want to see go to waste.
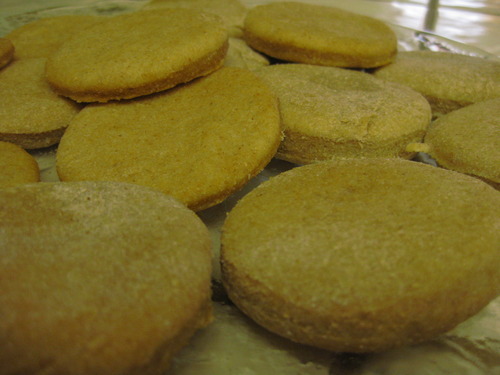
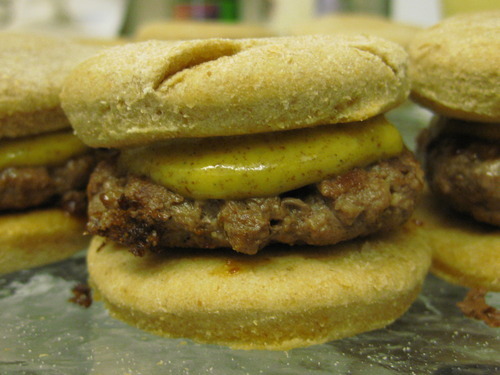
I rolled out the dough and used a biscuit cutter to make little rounds. We greased a cookie sheet with a few spritzes of Pam and baked the little rounds for a few minutes at 350 degrees, and wouldn't you know? They turned out better than I would have ever expected. (Turns out Joey isn't so clueless after all.) They weren't fluffy because the dough hadn't risen, but they were soft and warm, easy to chew, and made a wonderful little bread to top with jam or dip in balsalmic vinegar and olive oil. (We actually had them dipped in homemade pesto that night because it's what I had made for dinner. So addicting!) We couldn't go through them all ourselves that night, so I threw them into the freezer to use another time.

So what's my point of all this? I struggle with making homemade bread. It's hard for me, but I will persist. I will go on. I will not let lousy yeast or my own self-doubt get in my way. But now I know that if it doesn't work, there's something that can be done with the "ruined" dough. (I made sliders for Joey today for lunch--a perfect use for these strange culinary creatures.)

When I got a little older, I started using my parents new bread machine--after all, all I had to do was dump the ingredients in and wait for the magic to happen. My favorite recipe was for Colonial Bread, which suddenly I'm inspired to look up and try my hand at again. It was dark and warm, sweet with the flavor of molasses, and hearty enough to make me feel like it was something worth being proud of. When I got older, my dear friend Molly bought me a bread machine of my own that I could take with me when we moved into our own little apartment up at school, and it worked wonders for me-both because it produced great bread, but it also made my soul feel warm and comforted. I still have it (but admit I haven't used it in ages).
I'm determined to make a loaf of bread the old fashioned way again, but I haven't been met with much success. I've had good results with cinnamon rolls, pizza dough, and quick breads (which are too easy to really put in the same category as yeast breads), but a good ol' fashioned handmade loaf of bread is much more difficult for me. It's extremely frustrating because I know how to do it, and yet...something always seems to go wrong. I think it must be the yeast or the temperature of the water. Perhaps one has gone bad and the other isn't the right temperature. Oh well. I will press on.
This week I found what looked like an incredibly easy, healthy, tasty whole wheat bread recipe (again, from http://heavenlyhomemakers.com/how-to-make-whole-wheat-bread-tutorial). It was easy, but again, it didn't rise for me. The frustration! When my husband Joey got home from work, I had a big lump of dough sitting on the counter mocking me. He asked what I was going to do with it and I told him that I was just going to throw it away (but I wasn't ready to do so quite yet. It was too sad for me.). He suggested I made flat bread out of it.
Oh, my clueless husband. Now, I don't know how to make flatbread, but I'm fairly certain it doesn't involve rolling out whole wheat dough that didn't rise and just sticking it in the oven to bake. Still, I humored him, if for no other reason than he was taking an interest in what I was doing and encouraging me to press on to find a way to put to use something that I didn't want to see go to waste.
I rolled out the dough and used a biscuit cutter to make little rounds. We greased a cookie sheet with a few spritzes of Pam and baked the little rounds for a few minutes at 350 degrees, and wouldn't you know? They turned out better than I would have ever expected. (Turns out Joey isn't so clueless after all.) They weren't fluffy because the dough hadn't risen, but they were soft and warm, easy to chew, and made a wonderful little bread to top with jam or dip in balsalmic vinegar and olive oil. (We actually had them dipped in homemade pesto that night because it's what I had made for dinner. So addicting!) We couldn't go through them all ourselves that night, so I threw them into the freezer to use another time.

So what's my point of all this? I struggle with making homemade bread. It's hard for me, but I will persist. I will go on. I will not let lousy yeast or my own self-doubt get in my way. But now I know that if it doesn't work, there's something that can be done with the "ruined" dough. (I made sliders for Joey today for lunch--a perfect use for these strange culinary creatures.)

Strawberry Banana Bread-July 15, 2010
In the past few days, I've been learning as much as I can about organic living, which of course includes organic cooking. Real food, sans the processing that so much of our "food" goes through on its way to our table. Anyhow, I came across a recipe for Strawberry Bread on a fabulous site (http://heavenlyhomemakers.com) and threw in a few chocolate chips upon Laura's suggestion because I agreed with her that it sounded yummy.
Of course, in my currently non-local, non-organic kitchen, I didn't have a few of the key ingredients the original recipe called for (specifically, rapadura. I used plain old sugar instead). But, I decided that since I had comparable conventional ingredients, I could at least start experimenting. I did, however, have my trusty bag of whole wheat flour that I brought from my own kitchen when my husband and I recently moved in with my parents (another story for another day). That combined with the myriad of strawberries leftover from a big weekend birthday party provided enough of what I absolutely needed to try the recipe. In the end? It was very, very good. Delicious, even. I highly recommend it.
Next time I make it, I will make it with rapadura, if I can get my hands on any. I'm on the hunt. But I also want to try it with less fat, perhaps add some flax meal or something, and reduce the amount of cinnamon (just my own preference).
Today, inspired by the idea of strawberry bread, I came up with an idea for strawberry banana bread. I used the strawberry bread recipe as a guide, but tweaked it to my own specifications. I ran into one small snag when I was mixing up the batter, though. I didn't have any eggs. Not a single one to be found. So, I just left them out--and the result was surprisingly good.
Here's my recipe for Strawberry Banana Bread, but I'm sure I'll change it a bit and make it even more delicious (and healthy!) in the weeks to come.
Ingredients:
1 very ripe banana (largish)


Of course, in my currently non-local, non-organic kitchen, I didn't have a few of the key ingredients the original recipe called for (specifically, rapadura. I used plain old sugar instead). But, I decided that since I had comparable conventional ingredients, I could at least start experimenting. I did, however, have my trusty bag of whole wheat flour that I brought from my own kitchen when my husband and I recently moved in with my parents (another story for another day). That combined with the myriad of strawberries leftover from a big weekend birthday party provided enough of what I absolutely needed to try the recipe. In the end? It was very, very good. Delicious, even. I highly recommend it.
Next time I make it, I will make it with rapadura, if I can get my hands on any. I'm on the hunt. But I also want to try it with less fat, perhaps add some flax meal or something, and reduce the amount of cinnamon (just my own preference).
Today, inspired by the idea of strawberry bread, I came up with an idea for strawberry banana bread. I used the strawberry bread recipe as a guide, but tweaked it to my own specifications. I ran into one small snag when I was mixing up the batter, though. I didn't have any eggs. Not a single one to be found. So, I just left them out--and the result was surprisingly good.
Here's my recipe for Strawberry Banana Bread, but I'm sure I'll change it a bit and make it even more delicious (and healthy!) in the weeks to come.
Ingredients:
1 very ripe banana (largish)
1 c cut strawberries
1 ½ c whole wheat flour
½ c brown sugar
1 tsp cinnamon
½ tsp salt
½ tsp baking soda
½ tsp baking powder
2 T canola oil
1 ½ tsp flax seed meal (if you have it/want to use it).
Method:
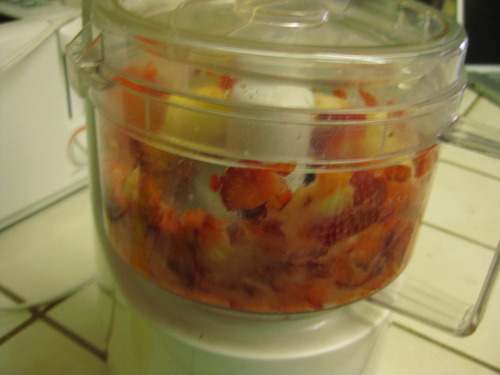
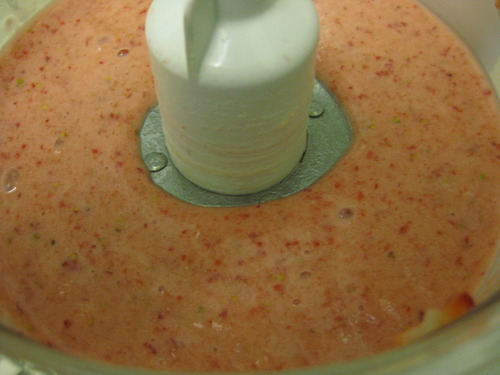
Mix together dry ingredients. Set aside. Blend stawberries and banana in a food processor or blender until smooth (like a smoothie).


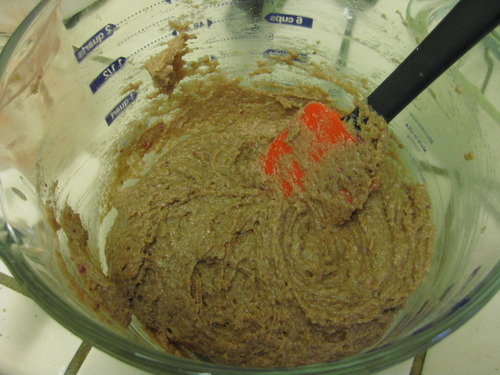
Add the blended fruit to the dry ingredients; then, add oil to mixture and blend well.

Pour into greased glass loaf pan (I usually just sprayed the pan with Pam); sprinkle with flax seed meal. Bake at 350 degrees for 45 minutes.
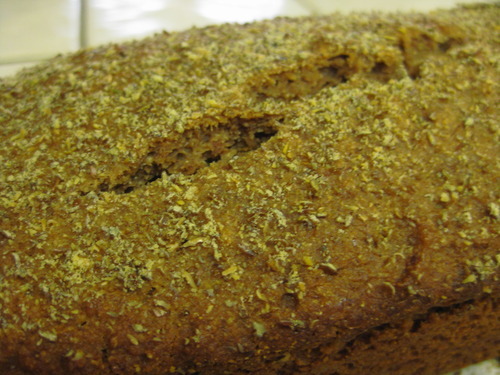
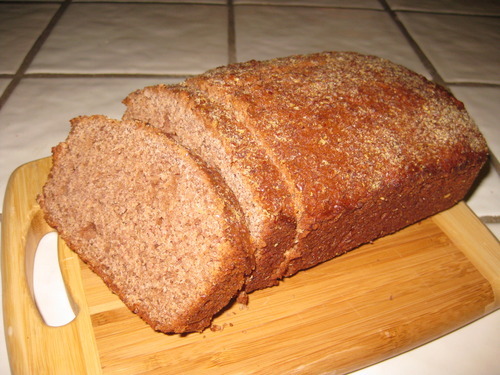
The result? Ta-da! I love the texture the flax seed meal gave the top. It gave it a slight crunch, especially when toasted (which, by the way, is really good).

Ah, the simple joy of something freshly baked. I think I might be addicted to it.

Subscribe to:
Posts (Atom)